|
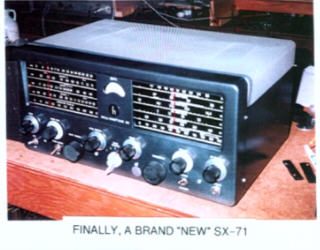
“Labor of Love”? An SX-71 Restoration |
By Rene K1MVP |
|||
|
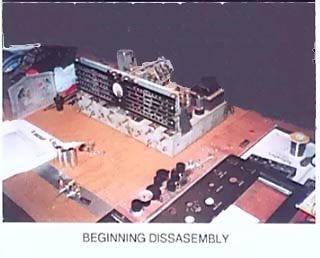
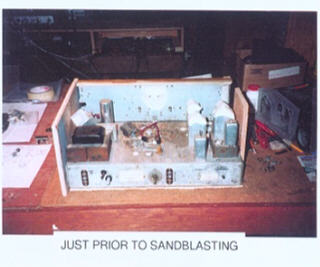
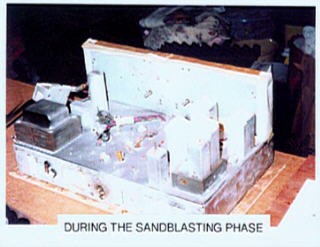
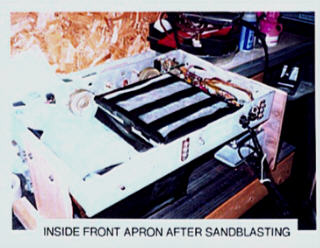
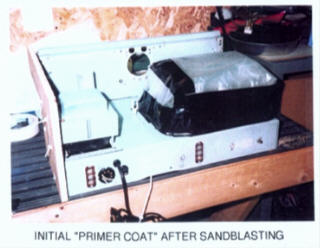
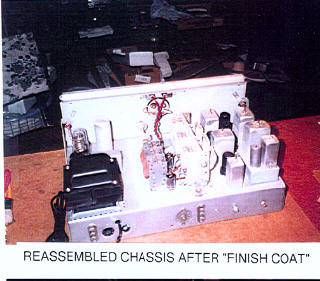
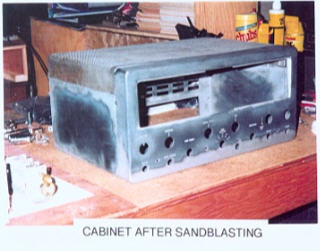
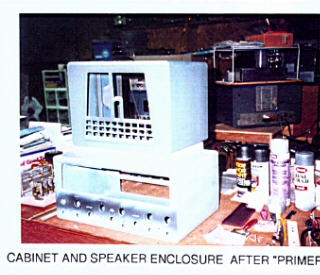
It was back in late 1959, early 1960 as a novice that I first became awareof the Hallicrafters SX-71 receiver, through Bert, W1HRG. A ham I greatly respected, he used an SX-71 coupled with a plate modulated Heathkit DX-35, and took net control of the Green Mountain Net in Vermont on a regular basis with this “combo”. Thus I knew the “71” was a good receiver. As a result, many years later, when I had a chance to trade an SP600 (that needed work) for an SX-71 that needed a “little help” I jumped at the chance, even though it had a “little rust” and a “little corrosion”. So, after swapping, I found myself the proud owner of a rusted SX-71 and the matching R-46 speaker, with matching rust to boot. I brought the receiver home, fired it up, and it seemed to work great. So what if it were a little rusted, no big deal. Well the rest became history as I found out what it would take to resurrect this receiver cosmetically. Let me share with you a story of frustration, challenge, victory and satisfaction of bringing this rig back to good looks. As I started to disassemble the receiver I removed the front panel and knew it was going to be a “challenge”. I was beginning to think the SP600 might not have been so bad after all. Anyway, one step at a time, easy does it; I proceeded to use a high-speed grinder, with Scotch-brand burnishing pads and proceeded to attack the front panel with limited results. I still could not get into the cracks and crevices and corner areas of the inside front panel to remove the rust. It was now time to take a break from efforts on the front panel, and move to attack the cabinet and top cover. The results were better, but I was still not happy with the look. Another “time out,” and I then decided to look at the chassis. Here was a real challenge, and I knew I was going to be in for some fun to remove the corrosion along the front apron where all the controls were mounted. I was really beginning to think the SP600 would have been the better deal, particularly at that point. I was trying to devise in my mind a way of removing this corrosion without disassembling the whole receiver part-by-part. I was not interested in making a “Heathkit” out of this receiver and even if I had gone the disassembly route, there would be no guarantee after all this labor that some critical part would not be damaged in the process. So what to do? I decided to return to the cabinet & front panel, and then an idea came: What about sandblasting? That sounded drastic but why not: This rust had to be completely removed before I would be satisfied, so, I decided it would be worth a try. A friend of mine had access to a sandblasting booth, and told me to bring the radio and “go to it”. It took a little time, but the results were great! I was able to remove all the rust on the front panel cabinet and top cover. Next I coated the bare metal with a self-etching primer. The cabinet & front panel looked 100% better and I hadn’t even applied the final coat. Ok, now back to the chassis, what to do? I had thought of using a Dremel grinder, with a wire brush or even a sanding disk, to work around the controls, and some of the components on the chassis. A great idea but still would not yield the kind of results I was looking for. Then, I had another brainstorm, how about sandblasting the chassis? It seemed great, or was it? Given the circumstances if it didn’t work I would just put out an ad for another SX 71 parts radio on QTH.COM or ER. So, with contingencies in place I proceeded to remove the tubes, the main tuning capacitor, the bandspread capacitor, and partially removed the power transformer. Also removed were all the front panel controls from the apron. I laid the controls off to one side but still connected, and proceeded to mask off all of the tube sockets, power transformer, and underneath the chassis. I then covered all of the critical areas with clear plastic. The real problem would be the good chance of getting some sand into the bandswitch wafers and the pots and switches on the front panel. So after the masking I grit my teeth, and proceeded to sandblast the whole top of the chassis and the front apron, both inside and out. It cleaned out the corrosion in a FB way! The real challenge lay ahead: How to now get rid of the residual sand that remained in the cracks and crevices underneath the chassis, and sure enough, now in the critical areas such as the bandswitch and the front panel controls. I blew out all I could with compressed air. I then used a lot of contact cleaner to work any remaining sand out of the bandswitch. You can tell when its out, as the switch will not feel gritty when its perfectly clean. I then attempted to clean the front panel controls, but must confess that ultimately I had to replace them. I was fortunate to have some spare. volume, tone, sensitivity controls and toggle switches thanks to WD8D. We were now on our way to a good looking radio. I decided to prime the cleaned chassis with a good self-etching auto primer to arrest any future corrosion, and while its not nickel plating, it is 100% better than it was. Oh, I might add that the dial support assembly had to be removed, along with the dial stringing pulleys. Although reassembly and restringing of the dial assembly was required, it really was not that bad, especially since the manual for the SX-71 provides restringing instructions. I had also sandblasted the main tuning condenser, (protectively knowing I have a spare one) and found that after blasting it, I successfully worked out the sand from the bearings with a tuner cleaner. Then, after repainting the chassis, I proceeded to remount the tuning capacitor, bandspread capacitor, power transformer, etc. I used new hardware to replace the old corroded hardware, and the radio was starting to look like a radio again. After re-installing all the tubes, dial support, and dial assembly, I powered the receiver up and voila; the receiver came back to life! It looked like the radio after this drastic cleaning was going to have a chance to be a star. I could now take a break, and focus on the finishing paint coat for the cabinet and front panel. I decided I would go for a charcoal gray (metallic) rather than the original black scheme of the SX-71. I finally found the finish I wanted from a local auto parts store, and I used a Hammerite silver for the top cover. Results came out great! The final challenge would be the front panel lettering. I used a dry etch transfer, and sealed the lettering with a clear “PlastiKote” spray. Note that while this works great, be careful not to apply it too heavy as it can lift the lettering. So we now are at the final phase of re-assembly of the major sections, and reinstalling the front panel and installing the receiver into the cabinet. This goes fast and thus the “finished product” looks like a brand new SX 71. The restored radio is now paired with a refurbished Heath DX-40 and an Astatic D104 mic, replicating what would be considered a modest “vintage” 1950’s station. While this project was very rewarding, I will say it took much more time than I anticipated. Would I do it again? Probably, but not until I’m retired or have a lot more time than I do now. It took me almost a year, off and on, to complete the project. Never one to be satisfied, I plan to build a small Q multiplier, and product detector for SSB, at some time in the future for the “71”. I might add, as WA5CMI stated in his Globe King restoration project in ER, that I don’t see how anyone can make money doing this. It has to be a “labor of love”. P.S. I have an SX 96 on the way. Hopefully it won’t need sandblasting. Feel free to contact Rene via email if you have questions. rdesa@mail.com
|
(Click On Images to enlarge)
PHASE 2
PHASE 3
|
|||
|
|
||||